Displaying User Comments
Table of Contents
In this series, I am going to guide you on how to create your very own blog! Yes, by the end of this tutorial, you will have a personal blog very much similar to this one up and running. If you so wish, you can use your new understanding to further customize it to make it more personal.
For your referrence, below is a list of the articles I have included in this series:
- Chapter 1: Hello, World!
- Chapter 2: Working with Templates
- Chapter 3: Flask Web Forms
- Chapter 4: Introduction to Database
- Chapter 5: Displaying User Comments
- Chapter 6: Styled Application
- Chapter 7: Working with Dates and Time
If you enjoy this article, please consider supporting my work and

The completed project used in this article can be referenced here.
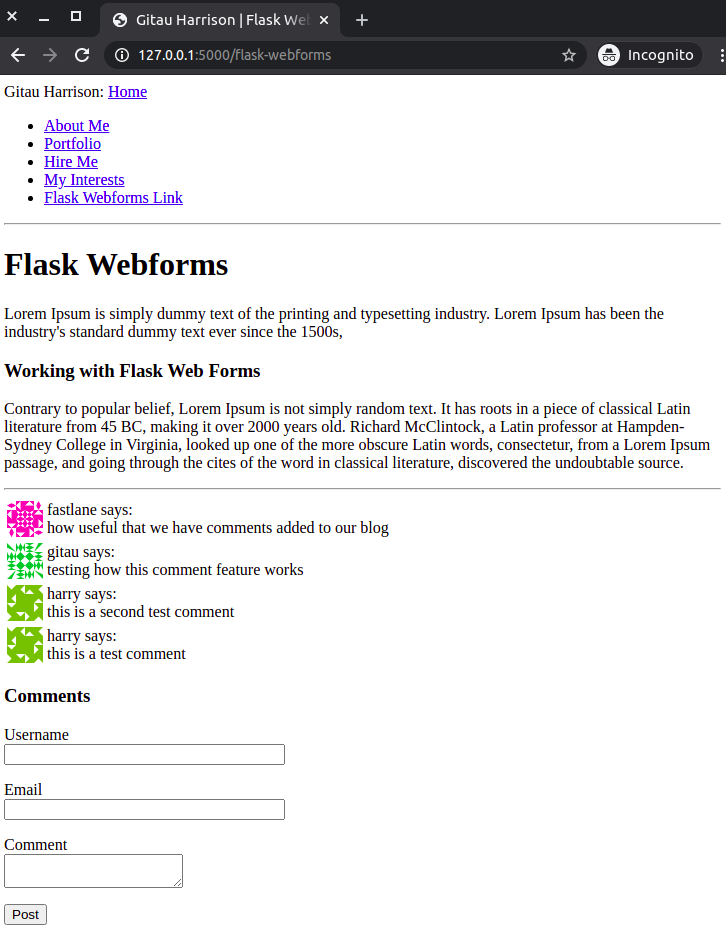
This chapter will focus on how we will go about creating a simple profile for our blog users. You have probably noticed that whenever a user posts a comment, his or her comment has an avatar and the user’s username. These credentials are displayed alongside the actual user comment.

User Avatar
We will use Gravatar service to provide images for all our users. It is very simple to implement this service. To request an image for a given user, the URL format https://www.gravatar.com/avatar/<hash> is used, where <hash> is the md5 hash for a user’s email address.
>>> from hashlib import md5
>>> 'https://www.gravatar.com/avatar/' + md5(b'harry@email.com').hexdigest()

# Output
'https://www.gravatar.com/avatar/3f4360b2a748228ba4f745a3ebd428dc'
The returned image has a default size of 80X80 pixels. This size can, however, be changed by adding an s argument to the URL’s query string. This is what I mean:
https://www.gravatar.com/avatar/3f4360b2a748228ba4f745a3ebd428dc?s=78.
You can further customize the URL to include another type of image for your avatar. Gravatar has these images:
- 404: do not load any image if none is associated with the email hash, instead return an HTTP 404 (File Not Found) response
- mp: (mystery-person) a simple, cartoon-style silhouetted outline of a person (does not vary by email hash)
- identicon: a geometric pattern based on an email hash
- monsterid: a generated ‘monster’ with different colors, faces, etc
- wavatar: generated faces with differing features and backgrounds
- retro: awesome generated, 8-bit arcade-style pixelated faces
- robohash: a generated robot with different colors, faces, etc
- blank: a transparent PNG image (border added to HTML below for demonstration purposes)
We can add an image of choice, say, the identicon, by passing the d argument to our query string. These options above are for users who do not have an avatar registered with the service.
Some sites can block the Gravatar service due to tracking concerns. So, if you do not see any image, maybe it is because of an extension that blocks the service.
Since avatars are associated with a user, we will add a logic to the User model.
from hashlib import md5

class User(UserMixin, db.Model):
    #...
    def avatar(self, size):
        digest = md5(self.email.lower().encode('utf-8')).hexdigest()
        return 'https://www.gravatar.com/avatar/{}?d=identicon&s={}'.format(digest, size)
To generate an md5 hash, we convert a user’s email to lower case. md5 support in Python is in bytes and not strings, hence we encode the string as bytes before passing it on to the hash function. Learn more from their documentation.
Display User Avatar
As earlier mentioned, the user avatar will be displayed alongside a comment. We will create a sub-template that will be used to display this information.
app/templates/_user_comments.html: Display User comments
<table>
    # Remove the back slashes
    <tr valign="top">
        <td><img src="\{\{ post.author.avatar(36) \}\}"></td>
        <td>\{\{ post.author.username \}\} says:<br>\{\{ post.body \}\}</td>
    </tr>
</table>
I have named this template using the _ just to help us differentiate a “normal” template from a sub-template. A sub-template will be included in a “normal” template. In chapter 3, we created a template called flashed_messages.html. Let us rename it to _flashed_messages.html. Make sure to also rename its inclusion in flask_webforms.html.
We will include these sub-templates in our articles. Our current article file is flask_webforms.html. Let us add user comments in this template:
app/templates/flask_webforms.html: Add user comments
{% extends 'base.html' %}

{% block content %}
    <h1>Flask Webforms</h1>
    <p>
        Lorem Ipsum is simply dummy text of the printing and typesetting industry.
        Lorem Ipsum has been the industry's standard dummy text ever since the 1500s,
    </p>
    <h3>Working with Flask Web Forms</h3>
    <p>
        Contrary to popular belief, Lorem Ipsum is not simply random text.
        It has roots in a piece of classical Latin literature from 45 BC,
        making it over 2000 years old. Richard McClintock, a Latin professor
        at Hampden-Sydney College in Virginia, looked up one of the more obscure
        Latin words, consectetur, from a Lorem Ipsum passage, and going through
        the cites of the word in classical literature, discovered the undoubtable source.
    </p><hr>
    {% include '_flashed_messages.html' %}

    <!-- User Comments Come Before the Form -->
    {% for post in posts %}
        {% include '_comments.html' %}
    {% endfor %}
        <!-- End of User Comments -->

    {% include 'comments.html' %}

{% endblock %}
We have used the for loop to get all the available comments from posts variable. I will discuss this variable in a minute below.
Query the Database for Comments
We need to update our flask_webforms view function to allow for the display of user comments.
app/routes.py: Update view function
from app.models import User, Comment
from app import db

def flask_webforms():
    form = CommentForm()
    if form.validate_on_submit():
        user = User(username = form.username.data, email = form.email.data)
        post = Comment(body = form.comment.data, author = user)
        db.session.add(user)
        db.session.add(post)
        db.session.commit()
        flash('Your comment is now live!')
        return redirect(url_for('flask_webforms'))
    posts = Comment.query.order_by(Comment.timestamp.desc())
    return render_template('flask_webforms.html', title = 'Flask Webforms', form = form, posts = posts)
The function validate_on_submit() checks the validity of user data. If all is valid, our two models (User and Comment models) are updated with new user data. You can recall from chapter 4 that db.session.add() adds a user session to the database and the changes are applied by db.session.commit(). A message will be flashed to the user telling him or her that the process was successful and that their comment is now live.
posts variable is used to store the result of us querying the Comment Table. The results are to be returned in the order of the the time they were posted. SQLAlhchemy uses order_by() function to achieve this. For our case, we want the order to be descending.
Try posting several comments from your article form. You should be able to see the comments displayed.