Flask Templates
Table of Contents
In this series, I am going to guide you on how to create your very own blog! Yes, by the end of this tutorial, you will have a personal blog very much similar to this one up and running. If you so wish, you can use your new understanding to further customize it to make it more personal.
For your referrence, below is a list of the articles I have included in this series:
- Chapter 1: Hello, World!
- Chapter 2: Working with Templates
- Chapter 3: Flask Web Forms
- Chapter 4: Introduction to Database
- Chapter 5: Displaying User Comments
- Chapter 6: Styled Application
- Chapter 7: Working with Dates and Time
If you enjoy this article, please consider supporting my work and

The completed project used in this article can be referenced here.
In chapter 1, you learnt how to display a string on the web browser. During this chapter, I will show you how to work with HTML templates that help create a more elaborate and dynamic web application.
Understanding Templates
Our application structure from chapter 1 was necessary to help us separate the application layout/presentation from the logic. Templates help us achieve this kind of separation. Flask templates are found in the templates subfolder within the application instance.
Working with Templates
Below, I am going to create a template for the home page of our blog.
app/static/templates/home.html: Home Page
<html>
    <head>
        <title>
            Gitau Harrison | \{\{ title \}\} # Remove the backslashes to get a pair \
                of curly braces
        </title>
    </head>
    <body>
        <h1>
            Available Updates
        </h1>
    </body>
</html>
This is a very standard HTML page. It basically contains <head> and <body> tags enclosed in <html>. The <head> has a dynamic content enclosed in \{\{ ... \}\}. The title is a placeholder variable which will be known at runtime.
With the simple presentation in place, we will now update our home view function.
app/routes.py: Render the home template
from flask import render_template
from flask import app

@app.route('/')
@app.route('/home')
def home():
    return render_template('home.html', title = 'Home')
Flask provides the render_template function which allows us to render (or to show) HTML templates. Above, we have returned the home.html template. Additionally, we have added a title to the function such that the placeholder value we saw previously will change to indicate ‘Home’. Jinja2 is responsible for substituting the placeholder value with the actual dynamic content.
We can make the title of our blog a bit more interesting. Jinja2 provides support for control statements to be used in templates. Let us update our home page to include a control statement.
app/templates/home.html: Conditional statemenst in template
<html>
    <head>
        {% if title %}
            <title>
                Gitau Harrison | \{\{ title \}\} # Remove the backslashes to get \
                    a pair of curly braces
            </title>
        {% else %}
            <title>
                Welcome to my Personal Blog
            </title>
        {% endif %}
    </head>
    <body>
        <h1>
            Available Updates
        </h1>
    </body>
</html>
The template is slightly smarter now to know when a title has been provided or not. If there is a title in the view function, then it will use it within it’s head, otherwise, it will resort to displaying Welcome to My Personal Blog.
Template Inheritance
At this stage of the application, it is very easy to make edits in the templates. However, when the application becomes bigger and bigger, say, to have several templates, then making these edits on each template can become difficult and tiring. Thankfully, Flask allows for template inheritence where we can define a base layout for the entire blog. From this base layout, every other template that we will create will inherit the base styles and features. This makes is easy whenever we want to make changes to our growing application. The second reason to consider template inheritence is so that we can maintain a consistene theme or layout throughout our blog. We want that certain features be present in each template. For example, we would want to maintain our navigation bar and our footer everywhere.
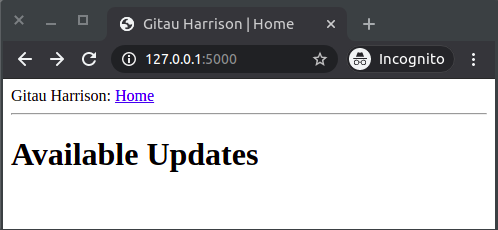
For these reasons, we have our base.html file in the templates sub-folder. This file will contain our navigation bar and our footer. Notabely, we will move our <head> logic from the home.html template we implemented earlier to the base.html template.
app/templates/base.html: Title, Navigation bar and Footer
<html>
    <head>
        {% if title %}
            <title>
                Gitau Harrison | \{\{ title \}\} # Remove the backslashes to get a \
                    pair of curly braces
            </title>
        {% else %}
            <title>
                Welcome to my Personal Blog
            </title>
        {% endif %}
    </head>
    <body>
        <div>
            Gitau Harrison: <a href="/home">Home</a>
        </div>
        {% block content %}

        {% endblock %}
    </body>
</html>
The block control statement is used to define where the derived templates can insert themselves. Blocks are to be given unique names which derived templates can reference to provide their own content.
app/templates/home.html: Template inheritence
{% extends 'base.html' %}

{% block content %}
    <h1>Available Updates</h1>
    <div>
        # Home Page Content Goes Here
    </div>
{% endblock %}
The extends statement used above establishes the inheritence link between the two templates. When Jinja2 is asked to render the home page, it will know that it also needs to embed the base.html file.
Run your Flask application and you should be able to see your home page.
With that, you can go ahead and create the other templates needed to complete our personal blog. For your reference, you will need:
- About Me template
- Portfolio template
- Hire Me template
- My Interests template
If you would like to see the changes you make in the application without the need to exit and restart the flask server every other time, you will need to update your flask environment variables. Add FLASK_ENV and FLASK_DEBUG environment variables in your .flaskenv file.
.flaskenv: More environment variables
#...
FLASK_ENV=development # you are working on a development server
FLASK_DEBUG=True # catching of live updates